Categories
3D Assignment

Harvard References

  • Brittney Dillander (2020)AMERICAN DINER RETRO BOOTH CORNER SUITE 50’S 60’S KITCHEN 1.5m X 1.5m CUSTOM SZ [Photograph] https://www.pinterest.co.uk/pin/326370304221746155/ [Accessed 01/11/2020]
  • Mid-Century Modern Freak (2013) Vintage Coke Machine [Photograph] https://midcenturymodernfreak.tumblr.com/post/56339927379/its-the-real-thing-vintage-coke-machine-via [Accessed 01/11/2020]
  • Wotever (2020) 24/7 Diner Neon Sign 64cm x 45cm [Photograph] https://www.wotever.co.uk/neon_signs.php [Accessed 01/11/2020]
  • Trent Furniture (2020) American Diner Furniture [Photograph] https://www.trentfurniture.co.uk/products/all-tables/american-diner-furniture/1 [Accessed 01/11/2020]
  • drinkstuff (2020) Diner Condiment Rack – Tablecraft Retro Wire Table Tidy Condiment Caddy [Photograph] https://www.ebay.co.uk/itm/Diner-Condiment-Rack-Tablecraft-Retro-Wire-Table-Tidy-Condiment-Caddy-/400915347313 [Accessed 01/11/2020]
  • Lime (2020) Retro Wall Clock, 50’s Styled American Diner Wall Clock, Pink [Photograph] https://www.amazon.co.uk/Retro-Clock-Styled-American-Diner/dp/B074WBQ5VW [Accessed 01/11/2020]
  • 3docean (2020) Retro Diner Booth/Bench/Sofa [Photograph] https://www.stlfinder.com/model/retro-diner-booth-bench-sofa-RoKSIDNh/2828238/ [Accessed 01/11/2020]
  • Event Prop Hire (2016) High quality American Diner Bar (3m) available to hire. View American Diner Bar (3m) [Photograph] https://www.pinterest.co.uk/pin/425168021073627001/ [Accessed 01/11/2020]
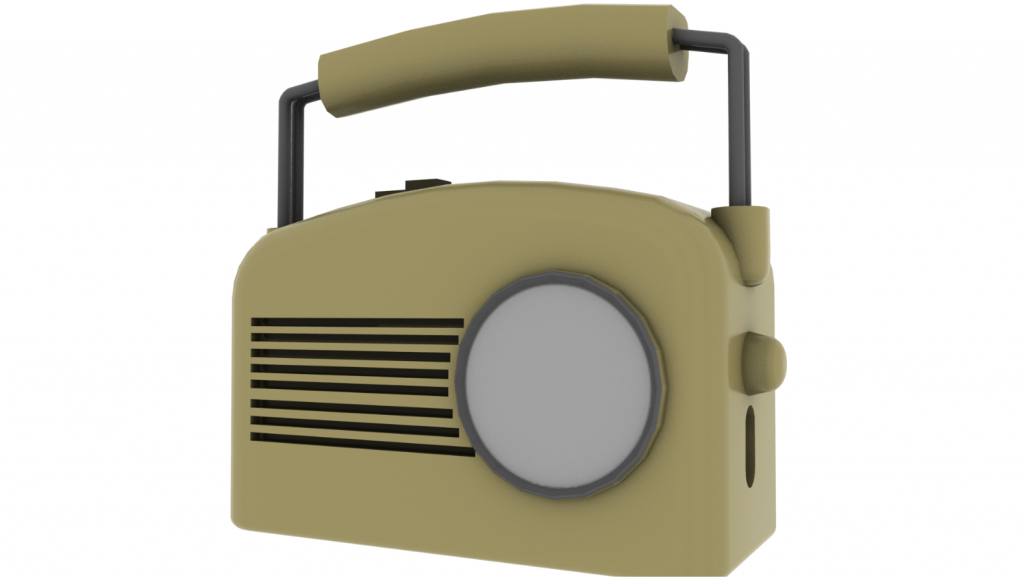
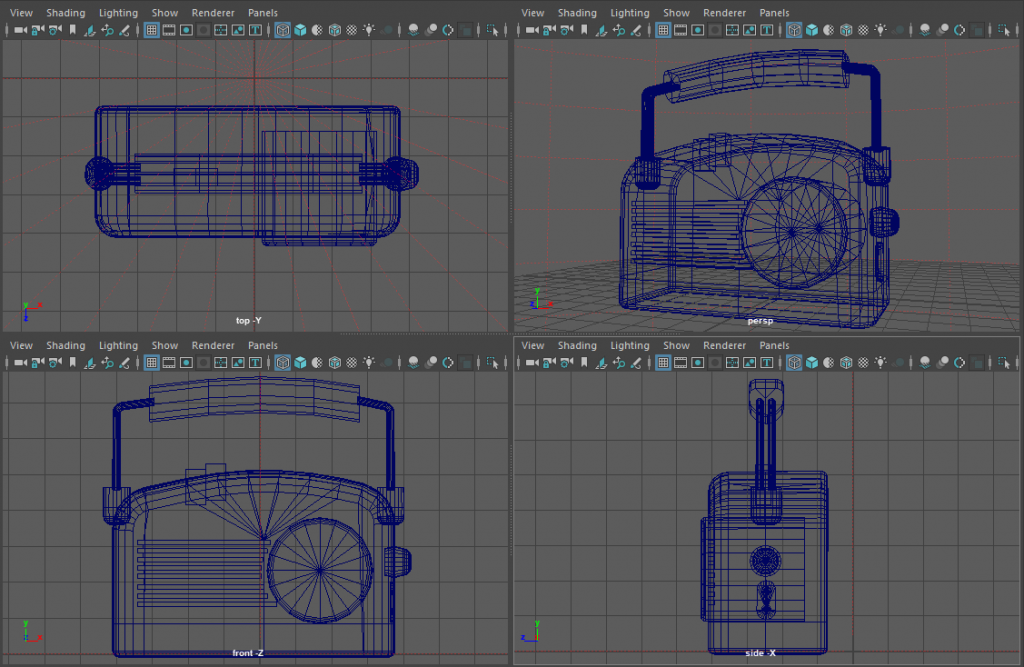
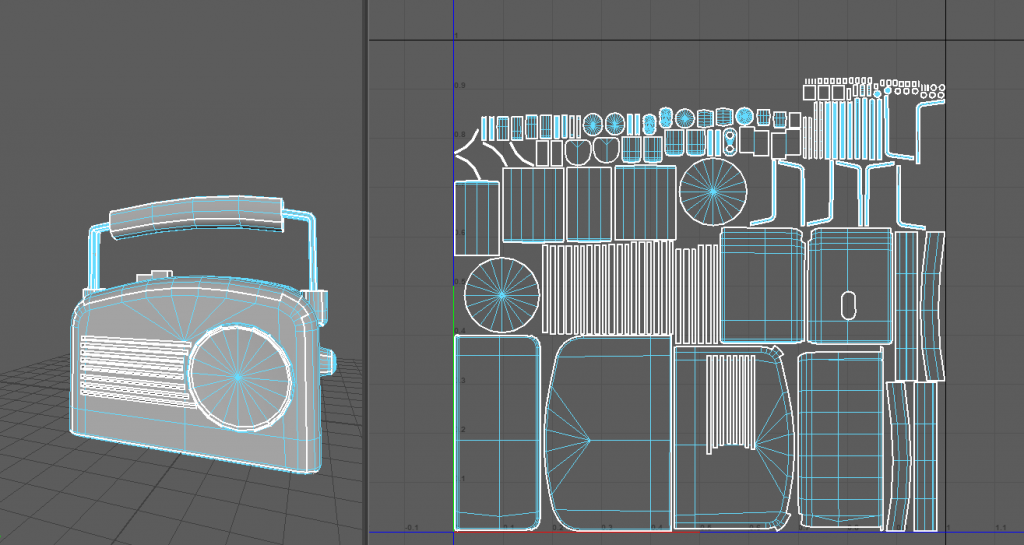
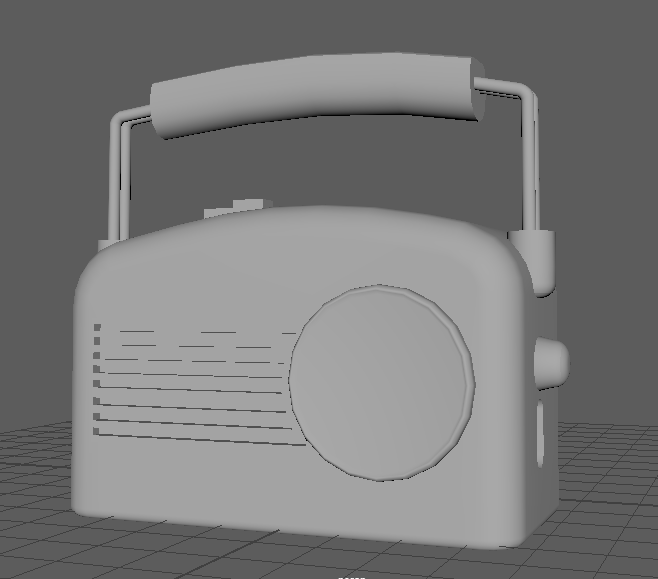
  • Konig (2020) Konig Retro Radio with Bluetooth Wireless Technology – Beige [Photograph] https://www.amazon.co.uk/Konig-Retro-Bluetooth-Wireless-Technology/dp/B00P7YXAYC [Accessed 01/11/2020]
  • Lauren Clark (2018) classic 50s diner milkshakes [Photograph] https://www.pinterest.co.uk/pin/65302263318708938/ [Accessed 01/11/2020]
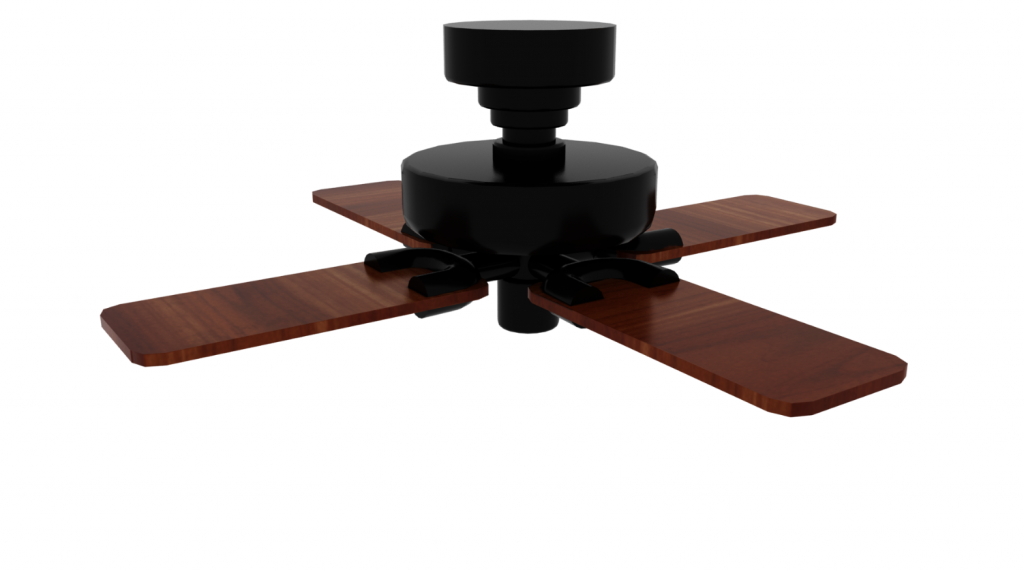
  • Hunter (2019) Hunter Original Antique Black 52-in Indoor/Outdoor Ceiling Fan (5-Blade) [Photograph] https://www.lowes.com/pd/Hunter-Original-52-in-Antique-Black-Indoor-Outdoor-Ceiling-Fan-5-Blade/999900941 [Accessed 01/11/2020]

Categories
3D Assignment

Model 10 (Condiments)

This was the final piece that I created and I feel like it’s the best piece that I did. It consist of ketchup, mustard, napkin holder and napkins, salt, pepper and sugar.

Categories
3D Assignment

Model 9 (Radio)

This is my ninth model, and is a vintage radio. I created this by using skills that I developed throughout the rest of my models such as the metal skills being the same as the one on the chair. And the rest of it consisting of a lot of squares being bevelled to give the illusion of it being smoothed.

Categories
3D Assignment

Model 8 (Soda Machine)

This is my eighth model that I created. This is an old fashioned soda machine. This was created using mainly squares whilst also using the Boolean feature to cut out areas at the bottom to make the stand.

Whilst writing this I have seen and realised that I also missed creating the handle for the soda machine itself.

Categories
3D Assignment

Model 7 (Ceiling Fan)

This is my seventh model that I created, and is a ceiling fan. This one was very enjoyable to create, I first started by creating the main middle piece of it. This consisted of just making a lot of cylinders and connecting them together whilst bevelling the edges to smooth everything down.

After that I created one of the fan pieces, I made this by combining a torus cylinder and square together and once made duplicated and moved across the four area of the fan.

Categories
3D Assignment

Model 6 (Clock)

This is my sixth model, which consists of a clock. This is the only model that I used the smooth tool on.

To start off with I created one square making sure that I used the multi cut tool as well as holding ctrl to create edges and boundaries around the outside so once I used the smooth tool it would smooth the edges and not turn the square into a circle. After that I altered the vertex of the corners of the square and dragged them in, to make the corners smooth out more.

After that I went and created the middle bit, Which I created using a cylinder and spreading it out and flattening it down at the same time. After that I added a bevel onto the outer edge to create the loop of metal around the outside of the clock face.

Categories
3D Assignment

Model 5 (Booth Chair)

This is my fifth model which is supposed to be a booth chair. To start off this was supposed to be a one sided booth chair and not a corner booth chair, but shortly after creating the booth chair it felt like something was off about it as it looked too small. So in turn I duplicated it twice and tried to splice all three of them together to create the booth chair you see below.

I started off by originally creating the bottom by altering the vertexs of the square to give it that angled impression. I then created the rest using squares bevels and for the head rest a cylinder.

Categories
3D Assignment

Model 4 (Chair)

This is my forth model and is a chair design for either the bar or a table by itself. I feel like this went really well and I feel like I managed to learn from previous errors such as my neon sign. I corrected this error by using only polygons from the start. This also became an ongoing thing throughout the rest of the models.

To start off I created a square and raised it off the floor expanding it to the right size and then shrinking it down to the correct thickness. After that I bevelled all of the edges on it to make it seem more like a pillow. I then duplicated this “cushion” to use as the backrest as well. Once done I started creating the legs. These where created by using a torus and deleting certain areas and extruding others.

Categories
3D Assignment

Model 3 (Bar)

This was my third model and is a dinner bar. The issue I had with this arrived fairly early on in the process. Whilst I was creating the rough area I extruded a square to create the back part of it and moved it too far accidently whilst moving it to which I pressed undo, which in turn resulted in multiple faces deleting themselves, after seeing this I pressed the redo button to try and fix the mistake to which the model ended up deleting more faces. After witnessing this I ended up just deleting the entirety of what I had done so far and starting fresh. Whilst creating this one I didn’t run into any issues.

I started off by first creating a square and moving the faces to expand it to the correct lengths. After that I extruded both the sides after using the Multi-cut tool to create the squares in the first place. After this I continued to create portions and extrude until the rough shape was made. After this I added bevels to a majority of the sides to smooth them.

Categories
3D Assignment

Model 1 and 2 (Milkshake Glass and Neon Sign)

These two models where the first ones that I did whilst creating my models and both where made in a similar manner and came across very similar errors as a bi-product.

The first model that I ever made was a milkshake glass, it was intended to both have liquid in the glass itself but to also have grooves on the side of like you see with stereotypical milkshake glasses but there was a lot of issues that occurred with this idea at the time.

To start off I decided the easiest and most efficient way to make this would be to use nurbs and curves, which in turn it was, I drew out the area of where I wanted the glass to be and used to revolve to create the glass. I then wanted to implement the curves into the sides which I thought about and eventually came to the thought process of Booleans, the only issue with this being that the model wasn’t made of polygons. I wasn’t sure fully on how to convert it over so I googled it, shortly after finding out that by putting the item into object mode you could turn nurbs into polygons by using the modify menu. This was where the first problem arose, after converting it the insides of glass had a lot of missing faces henceforth not being able to render a texture on it. I tried to fix it the best I could by trying a mixture between deleting face and reversing faces but there where some that I wasn’t able to remove.

I then moved onto the next bit of the model, the indents on the sides of the glass. I created multiple cylinders and tried to align them around the glass in an orderly fashion ready for them to be Booleaned. This was where the second problem happened, once I went and pressed the Boolean button a red error popped up at the bottom of my screen reading “error.incorrectobject” and deleted the model in front of me, I luckily managed to undo the Boolean but every time I tried to fix it, the same thing happened which is the reason for the milkshake glass looking as plain as it is.

The second one that I created was a neon sign of a car with the word “Diners” underneath it. I created this once again by using nurbs and curves. I decided to use the extrude feature for this. So to start off I created the lines for the the model itself, to a point drawing it out whilst using the top down camera. Once I finished drawing it out I places a NURBS circle down and resized and angled it to the correct size and position. I then moved it in line with the lines that I previously drew and extruded them along them, with some of the lines this worked really well but with others the extrude had issues with following the path for some reason.