The three different designs that I came up with for the portfolio was a walking cycle, a idle cycle as well as an action cycle, the action consisting of throwing a ball.
To start off the walking cycle will consist of a partially lifeless puppet. It will walk in a straight line with a partial limp as it drags its other foot across the floor. Making it seem almost as though the puppet although is alive, the process in which it was brought too wasn’t completely perfect.
Then with my idle cycle I would like to make an animation similar to that of the iconic “Someone’s Coming” scenes from Toy Story. Where the puppet would slump to the floor “lifeless” and after a short amount of time consisting between 2-3 seconds it would look around and stand back up.
Finally with the action cycle the reason why I went for throwing a ball was because it would once again allow me to show off the lack of bones and muscles that a puppet has and the therefore struggle that it would have throwing a ball. The animation will consist of the puppet picking up the ball as well as throwing it.
All the cycles work well with the character design as the design itself is in basic terms a toy. Toys are prominently non moving, or if they are they normally only have limited movement such as joints for there arms and legs or in some cases just there shoulders and hips. With each one of the designs the idea of these joint positions are taken into heavy consideration as to keep the animation as realistic as can be.
These are the final results for the animations themselves. If I had longer to work on them then I would in theory have changed a few things.
To start off I would have re rigged the legs, as shown in the idle animation/cycle they don’t bend the correct way, if I had to guess why this is, I’d probably say that I rigged them the incorrect direction henceforth making it so that the legs/joints bent in the wrong way. I really wish that I fixed this as it caused more issues than expected.
Next I wish I was able to actually import my model without maya crashing. As I feel like I would have had a lot more freedom with the animation / cycles as the character that I had already made had a backstory already and is a character I am much more familiar with. For example one of the original ideas was her playing with her cube similar to how Mei plays with snowball in overwatch. I had also thought of an idle animation similar to that of Moira’s sitting emote, the model would sit crossed legged and solve bits and pieces of the puzzle cube slowly unlocking more and more, but never fully unlocking it as the animation on the cube would cycle. This main issue arriving at the beginning of the module partially feels as though is one of the main things that limited my creativity as instead of this heavily fleshed out character I had a basic joe template that I had to try and construct an interesting story around.
Although I had these issues I still felt I did a good job with a majority of the rigging as well as the weight painting, even though it was my first time attempting both.
Another thing I would have changed if I had more time would have been the use of animation techniques within the animations themselves. As there were multiple times where I could have used techniques such as squash and stretch within the animation but decided against it to try and save time.
I would have also have preferred the animations, if I had painted the model instead of leaving it blank. If I had done this I might have had more creativity on the animations themselves but every time I attempted it, either Maya didn’t recall that I painted it or the software itself would crash normally causing me to lose more progress than just the paint scheme that I had made.
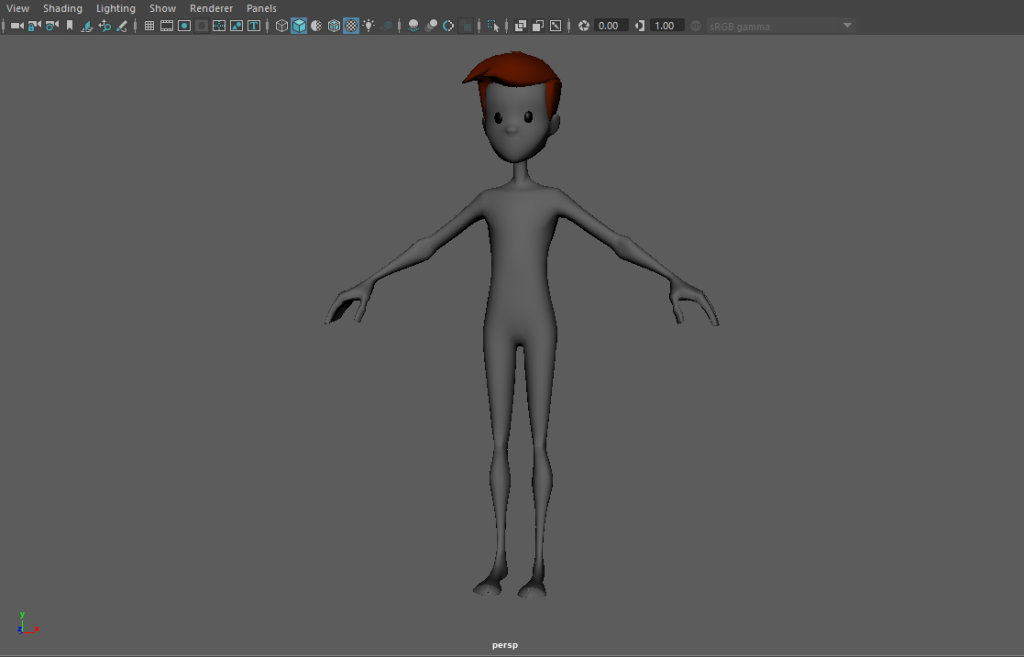
As the design of the character is not that of my own due to issue of being able to import my previously made character. I decided to attempt to make it my own though the use of both the personality that I gave it as well as the colour scheme and design that I went for with it.
The character itself is that of the “AnimationMentor Character”. I knew when I first saw it what I was going to use it for. The general way that it’s designed as well as the overall proportions of the body gave me very puppet/soft toy feels and with that I ran with it.
I want to make sure that whilst I’m making the character that I put across well that he’s a puppet in both the art and design. I’m hoping to paint him a multitude of colours making him almost patchwork with the seams and stitching still visible. Hopefully that puts across visually what I was aiming for and then after that the actual animations themselves will be were you can as a viewer fully understand that.
I am hoping to make the animations themselves seem almost inhuman or lifeless. Putting across once again that although it looks partially like a human that it most certainly is not.
The character backstory as well as it’s reasoning for the way it moves and henceforth partial lack of movement consists of; The puppet itself is a soft toy that was attempted to be brought to life, this attempt somewhat worked but only partially making it difficult for the puppet to move. This is shown by it’s lack of movement in it’s right leg within the movement cycle as well as it’s arms seemingly being overly heavy and droopy whatever it is that’s brought it alive hasn’t quite made it to those appendages as of yet.
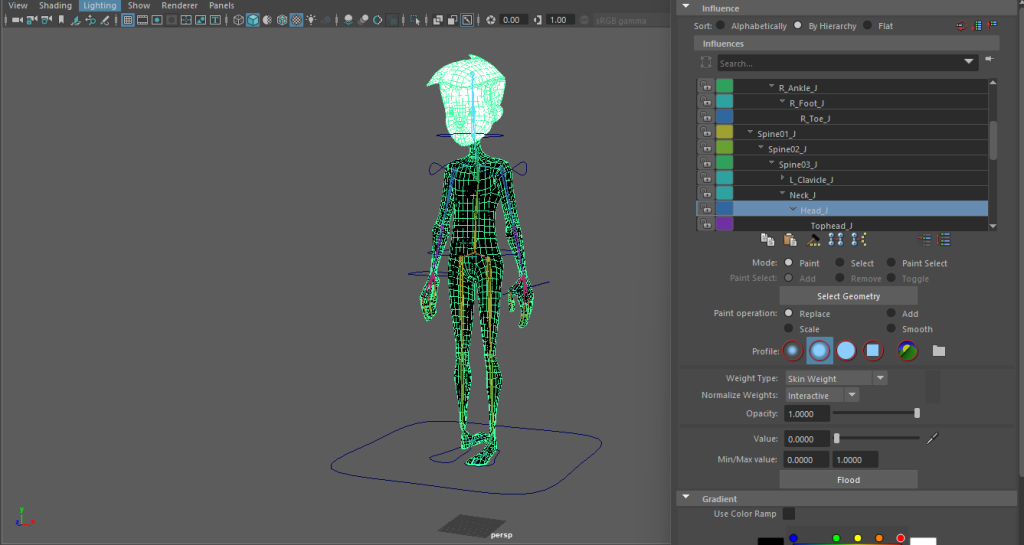
With the character skinning and painting I feel as though it went rather well.
Initially I started off by doing the skinning, I did this during the rigging process. Skinning the model allowed the joints rig and the mesh itself to work as one and therefore allowed it to actually work when trying to animate things. This allowing the rig to act similar to that of your muscles and the mesh acting as the skin to hide said muscles and keep everything contained within.
After I had done all of the rigging I started on adding the paint weights to the model. This made it so that when I moved specific joints it didn’t move parts of the mesh that weren’t supposed too.
The paint weights main function was to make sure that there was no ripping or deforming of the mesh itself. This allows for a much smoother animation and mesh itself. Without this function, there would have been deformation in both the ribs as both of the shoulders were connected to them. Another thing that would have happened if not for weight paints was that every time that the head moved it would have caused it to stretch and expand instead with the neck instead of staying still. Applying weight paints to the model is similar in turn to adding bones to the model as shown by solidifying the head and adding the skull as well as solidifying the ribs and adding them to the model, similar to how the joints work as the muscles of the mesh.
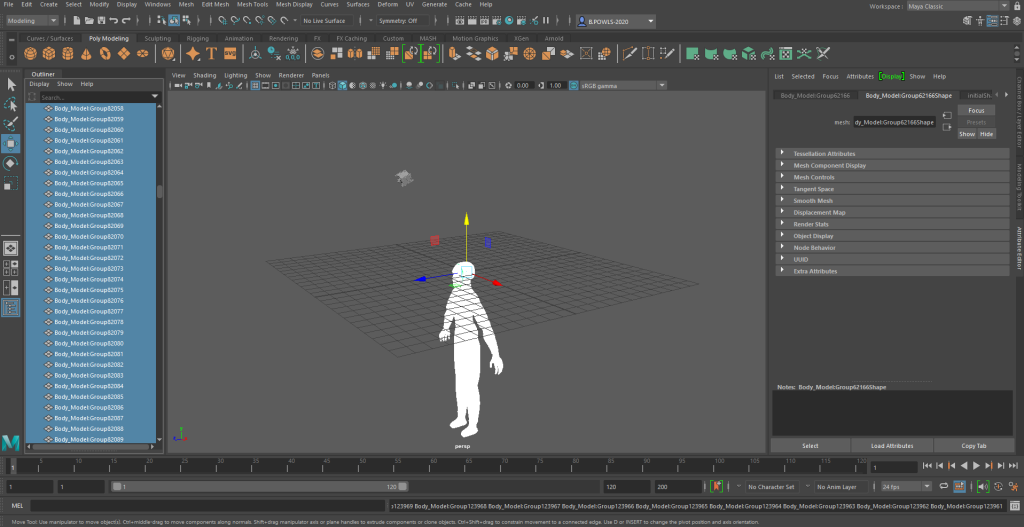
I initially attempted before designing anything to see if I could export/import my ZBrush model that I made in a previous module into Maya. I managed to successfully export all of her parts but after attempting to import her into Maya I realised that she was too complex and would take far too long for my laptop to process anything. I knew this after I watched it take 42 minutes to import the actual model into it and from that point on it felt as though my laptop was dying as it was continually lagging.
So with this new found issue I decided to use the pre-made character and rig him instead. The character that I decided to use for this was the “AnimationMentorCharacter.rar” as it had a somewhat puppet style to it which I thought might work well for the animations I was planning on doing.
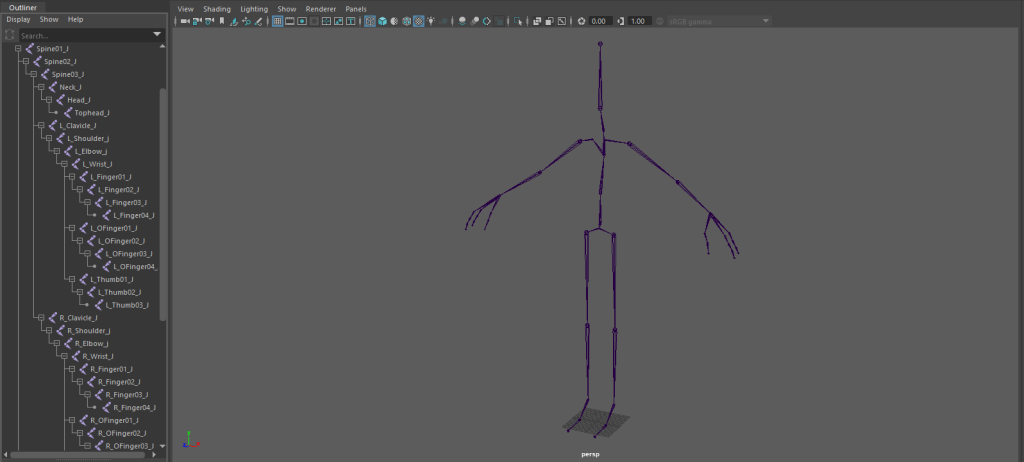
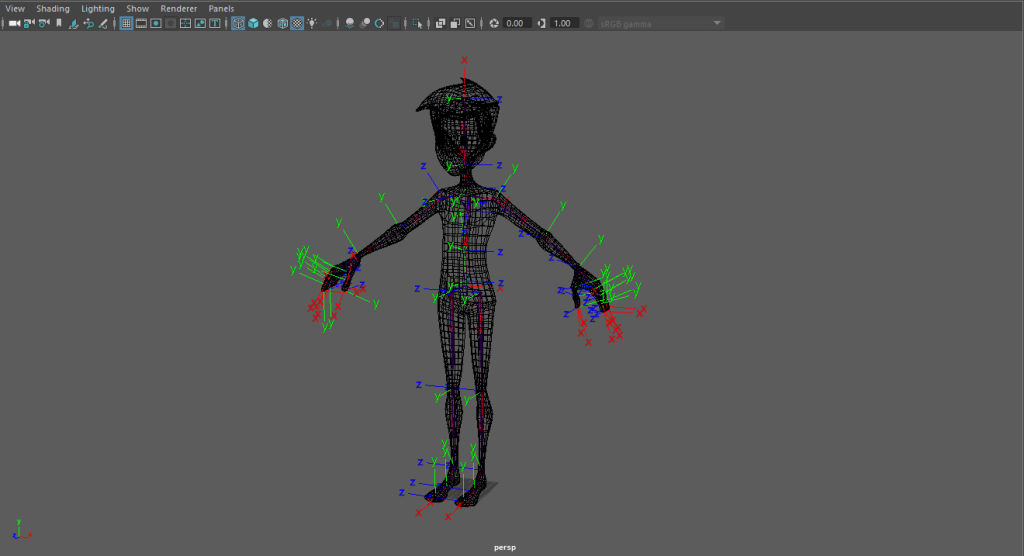
After I had the model I had to make a skeleton for it. I did so by using the “create joint” tool. I went through the steps we did in the lab session starting initially with the left leg, then the left arm and so on, making sure to use the correct naming conventions throughout once I had completed a specific segment.
Once that was sorted I then sorted out the orient of the joints using the “Orient Joints” tool. Making sure that the x axis always followed the skeleton and that the y axis always pointed forwards.
After this I started to add controllers to the model to help me move it without the need to see the rigging. These controllers consisted of feet, arms, hips, shoulders and head, and each one of them allowed me to move either a joint itself or an IK handle which then moved a joint, in turn making the animation process easier to do. I added all of the controls and was able to finally start the animation process.
After I had the model rigged I started to look at how to create realistic movement with it. I knew that the first thing I was gonna have to do is look for reference material, so that’s what I did. My idea with this character was for him to be a puppet/stuffed toy of sorts so for that kind of realistic movement I had to look at a lot more than just walking animations.
I started off by looking over videos on Youtube, these videos being of walking animations of both 2D and 3D to try and get a better understanding of how to do it. Then I started to look at references that would better suit a puppet, such as:
https://www.youtube.com/watch?v=hyR3zaooZ0w
https://www.youtube.com/watch?v=aPjs6ZDQrEU
https://www.youtube.com/watch?v=z-7q1kV88eo
https://www.youtube.com/watch?v=i6BFGCA3Quw
Which allowed me to see the different ways of which I could design the walk and make it realistic to how what it is.
I also recorded myself to see better how the cycles would physically look. These would allow me to have much better references than just an image in my head. Although I didn’t film or attempt the creation of the idle animation / cycle as the idea for that is to look almost like a soft toy that has just drooped to the floor as either a hiding mechanism or as a trap.